Choosing the right hardware
As they say when purchasing new hardware, you can have two of the following: good, cheap or fast. When building a development lab environment we want cheap and can sacrifice on fast. We won’t be getting line rate gigabit, instead in the order of 800 Mbit/s which will still be plenty sufficient for many applications.
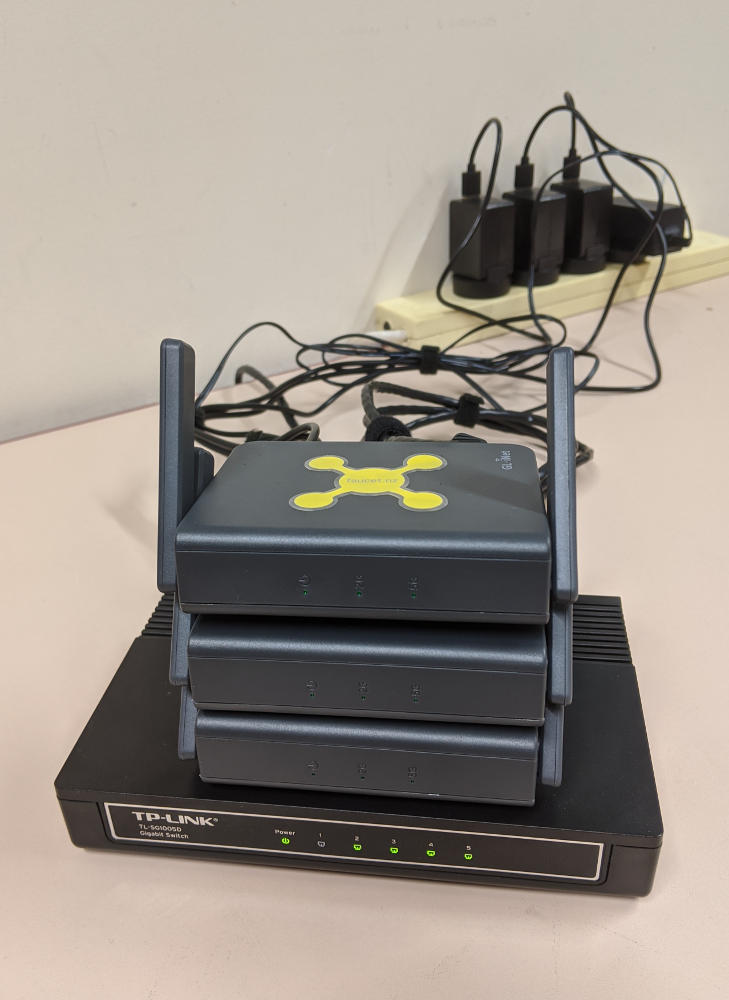
Today we are going to be focusing specifically on the $69 GL-AR750S wireless travel router from GL-iNet since I have tested it and know it works well, however many other GL-iNet devices as well as many other devices supported by OpenWrt should work as well. The GL-AR750S has 3 gigabit ports and a dual-band 2.4GHz/5GHz wireless radio. The firmware it ships with is a modified version of OpenWrt without OpenFlow support but we can easily flash a version of vanilla OpenWrt with the latest version of Open vSwitch which will let us do OpenFlow on this device.
Performance of the GL-AR750S is pretty good considering all the switching happens in software on the embedded CPU (no hardware offloads). With iperf I could achieve 820 Mbits/sec between the two LAN ports when using advanced faucet features such as inter-VLAN routing. WiFi performance was a bit more variable with iperf results in the range of 80 – 180 Mbits/sec.
Device setup
The following steps will walk you through setting up the GL-AR750S for use in an OpenFlow development lab. First, we will flash the latest copy of vanilla OpenWrt, then we will configure it to work with OpenFlow by adding Open vSwitch which will be our OpenFlow Agent. We will then install and configure faucet to be our OpenFlow controller.
1. Flash OpenWrt
The first step is to replace the firmware version shipped with the device with the latest version of OpenWrt. The GL-AR750S uses both NAND and NOR memory which isn’t supported by the latest stable version of OpenWrt, so we will be using a nightly snapshot of OpenWrt (we need to use this anyway to get the latest version of Open vSwitch). The process for flashing the latest OpenWrt snapshot version on the GL-AR750S is documented in this forum post, however we will detail the steps in this blog post as well:
- Download the latest OpenWrt snapshot NOR firmware for GL-AR750S
- Put the GL-AR750S into debrick mode and flash NOR firmware file:
- Connect your computer to one of the LAN Ethernet ports of the router. You must leave the other ports unconnected.
- Fold the antenna so they are pointing up and hold down the reset button (which is on the side of the device) and plug the power cable in.
- Watch the 5G LED on the front, once it has flashed 5 times you can release the reset button.
- Set your computer’s IP address to 192.168.1.2.
- Use Firefox or Chrome to visit http://192.168.1.1.
- Upload the NOR firmware file openwrt-ath79-nand-glinet_gl-ar750s-nor-squashfs-sysupgrade.bin (that you downloaded in the earlier step) to the webpage and click Update Firmware button.
- Wait for around 3 minutes. Don’t power off your device when updating. The router is ready when the power LED is solid and not blinking.
- Download the latest OpenWrt snapshot NOR/NAND firmware for GL-AR750S
- Use the sysupgrade method to flash the NOR/NAND firmware to gain access to entire flash filesystem space, the steps for doing this are as follows:
- Connect your computer to one of the LAN Ethernet ports of the router (you can’t use the WAN port).
- Set your computer to use DHCP, it should receive an address inside of 192.168.1.0/24.
- Copy the NOR/NAND firmware file openwrt-ath79-nand-glinet_gl-ar750s-nor-nand-squashfs-sysupgrade.bin from your computer to /tmp on the router with SCP:
$ scp openwrt-ath79-nand-glinet_gl-ar750s-nor-nand-squashfs-sysupgrade.bin root@192.168.1.1:/tmp/-
- SSH to the router and run the sysupgrade command:
$ ssh root@192.168.1.1

root@OpenWrt:~# sysupgrade -v /tmp/openwrt-ath79-nand-glinet_gl-ar750s-nor-nand-squashfs-sysupgrade.bin-
- Wait approximately 1 minute for the upgrade to finish before logging back in and completing the next steps of configuring the device.
2. Configure OpenWrt
OpenWrt uses a system called UCI for configuration. You can also install the web interface LUCI if you want a web GUI for configuring things how you like, but I’ll just use the UCI CLI for this tutorial.
Before we start configuring the device you will need to SSH into the router from your computer:
$ ssh root@192.168.1.1Now we will start by doing a few basic things such as setting a password and hostname by running the following commands:
root@OpenWrt:~# passwd

root@OpenWrt:~# uci set system.@system[0].hostname='openflow-ap'

root@OpenWrt:~# uci commit
root@OpenWrt:~# reload_config
Now we want to delete the default networking configuration that comes with OpenWrt and add our own so that the router will do what we want.
First, let’s go ahead and delete the default firewall configuration so that it doesn’t get in our way:
root@openflow-ap:~# while $(uci delete firewall.@rule[-1] 2>/dev/null); do :; done
root@openflow-ap:~# while $(uci delete firewall.@zone[-1] 2>/dev/null); do :; done
root@openflow-ap:~# while $(uci delete firewall.@forwarding[-1] 2>/dev/null); do :; done

root@openflow-ap:~# uci commit
root@openflow-ap:~# reload_config
Now we need to reconfigure the network so that the physical ports are mapped to the right virtual interfaces and that we have an IP address assigned for managing the router. The default network configuration for this device is the physical wan port (1) is mapped to virtual interface eth0.2 and both the physical lan ports (2 and 3) are both mapped to the same virtual interface eth0.1.
What we want to do is remap these physical ports so that they are all exposed as separate virtual network interfaces in OpenWrt which will give us full control over the switching behaviour. We also need to setup a network interface that can be used to talk to our OpenFlow controller. I personally use out of band control since it is a lot simpler, but it does mean I will have to reserve one of my physical network ports for this. If you want to keep all three network ports you could look at Open vSwitch’s in-band mode, but I won’t be covering this here.
First, we will clear the current physical port and virtual interfaces mapping, then redefine the mapping so that:
| Physical Port | Virtual Interface |
|---|---|
| wan | eth0.1 |
| lan1 | eth0.2 |
| lan2 | eth0.3 |
Run the following commands to redefine the port mappings to match the table above:
root@openflow-ap:~# while $(uci delete network.@switch_vlan[-1] 2>/dev/null); do :; done

root@openflow-ap:~# uci add network switch_vlan
root@openflow-ap:~# uci set network.@switch_vlan[-1]=switch_vlan
root@openflow-ap:~# uci set network.@switch_vlan[-1].device='switch0'
root@openflow-ap:~# uci set network.@switch_vlan[-1].vlan='1'
root@openflow-ap:~# uci set network.@switch_vlan[-1].ports='1 0t'

root@openflow-ap:~# uci add network switch_vlan
root@openflow-ap:~# uci set network.@switch_vlan[-1]=switch_vlan
root@openflow-ap:~# uci set network.@switch_vlan[-1].device='switch0'
root@openflow-ap:~# uci set network.@switch_vlan[-1].vlan='2'
root@openflow-ap:~# uci set network.@switch_vlan[-1].ports='2 0t'

root@openflow-ap:~# uci add network switch_vlan
root@openflow-ap:~# uci set network.@switch_vlan[-1]=switch_vlan
root@openflow-ap:~# uci set network.@switch_vlan[-1].device='switch0'
root@openflow-ap:~# uci set network.@switch_vlan[-1].vlan='3'
root@openflow-ap:~# uci set network.@switch_vlan[-1].ports='3 0t'
Now what we will do is delete the predefined lan, wan and wan6 interfaces and create our own new lan1 and lan2 interfaces:
root@openflow-ap:~# uci delete network.lan
root@openflow-ap:~# uci delete network.wan
root@openflow-ap:~# uci delete network.wan6

root@openflow-ap:~# uci set network.lan1=interface
root@openflow-ap:~# uci set network.lan1.ifname=eth0.2

root@openflow-ap:~# uci set network.lan2=interface
root@openflow-ap:~# uci set network.lan2.ifname=eth0.3
I also re-assigned the wan interface to use as an out-of-band management interface (for SSH management and OpenFlow control channel), we can configure the new interface as DHCP:
root@openflow-ap:~# uci set network.mgmt=interface
root@openflow-ap:~# uci set network.mgmt.ifname=eth0.1
root@openflow-ap:~# uci set network.mgmt.proto=dhcp
Or with a static IP address (change ipaddr/netmask/gateway/dns to match your network):
root@openflow-ap:~# uci set network.mgmt=interface
root@openflow-ap:~# uci set network.mgmt.ifname=eth0.1
root@openflow-ap:~# uci set network.mgmt.proto=static
root@openflow-ap:~# uci set network.mgmt.ipaddr=172.16.0.1
root@openflow-ap:~# uci set network.mgmt.netmask=255.255.255.0
root@openflow-ap:~# uci set network.mgmt.gateway=172.16.0.254
root@openflow-ap:~# uci add_list network.mgmt.dns=172.16.0.254
Finally, let’s make sure the SSH daemon is only listening on the new management interface and that all the DHCP servers are disabled:
root@openflow-ap:~# uci set dropbear.@dropbear[0].Interface='mgmt'
root@openflow-ap:~# uci delete dhcp.lan
root@openflow-ap:~# uci delete dhcp.wan
Finally, we will commit all these network changes together:
root@openflow-ap:~# uci commit
root@openflow-ap:~# reload_configNote: If you mess up your settings or lock yourself out of the router you can use the OpenWrt failsafe mode to gain access to your device again.
3. Configure WiFi
In this step we will configure the 2.4GHz/5GHz WiFi radios so that they start broadcasting an SSID, in this case faucetsdn and using the Pre-Shared Key faucetsdn.
root@openflow-ap:~# for radio in 0 1; do
root@openflow-ap:~# uci delete wireless.radio${radio}.disabled
root@openflow-ap:~# uci set wireless.default_radio${radio}.encryption=psk2
root@openflow-ap:~# uci set wireless.default_radio${radio}.ssid=faucetsdn
root@openflow-ap:~# uci set wireless.default_radio${radio}.key=faucetsdn
root@openflow-ap:~# uci delete wireless.default_radio${radio}.network
root@openflow-ap:~# done

root@openflow-ap:~# uci commit
root@openflow-ap:~# reload_config
4. Configure Open vSwitch
Now let’s install Open vSwitch and configure it so that our device can start speaking OpenFlow.
First, install the openvswitch package with the opkg package manager:
root@openflow-ap:~# opkg update
root@openflow-ap:~# opkg install openvswitch
Now we need enable Open vSwitch so that it starts on boot and configure a virtual network interface for our Open vSwitch bridge (ovsbr) so that OpenWrt knows it exists and can interact with it.
root@openflow-ap:~# uci set openvswitch.ovs.disabled=0
root@openflow-ap:~# uci set network.ovsbr=interface
root@openflow-ap:~# uci set network.ovsbr.ifname=ovsbr
root@openflow-ap:~# uci set network.ovsbr.proto=static

root@openflow-ap:~# uci commit
root@openflow-ap:~# reload_config
root@openflow-ap:~# /etc/init.d/openvswitch start
Now that Open vSwitch is installed we need to configure it by creating a bridge and attaching our two lan ports (eth0.2 and eth0.3) and our two WiFi ports (wlan0 and wlan1):
root@openflow-ap:~# ovs-vsctl --may-exist add-br ovsbr -- \
    set bridge ovsbr other-config:disable-in-band=true -- \
    set bridge ovsbr fail_mode=secure

root@openflow-ap:~# ovs-vsctl --may-exist add-port ovsbr eth0.2 -- set Interface eth0.2 ofport_request=1
root@openflow-ap:~# ovs-vsctl --may-exist add-port ovsbr eth0.3 -- set Interface eth0.3 ofport_request=2
root@openflow-ap:~# ovs-vsctl --may-exist add-port ovsbr wlan0 -- set Interface wlan0 ofport_request=3
root@openflow-ap:~# ovs-vsctl --may-exist add-port ovsbr wlan1 -- set Interface wlan1 ofport_request=4
We also need to add an additional patch to hostapd to add support for attaching to Open vSwitch bridges. WAND maintains a third party package repo which has a patched hostapd for OpenWrt, let’s add that repo:
root@openflow-ap:~# opkg install uclient-fetch libustream-openssl ca-bundle ca-certificates
root@openflow-ap:~# . /etc/os-release && echo "src/gz hostapd https://packages.wand.net.nz/openwrt/hostapd/${OPENWRT_ARCH}" >> /etc/opkg/customfeeds.conf
root@openflow-ap:~# wget https://packages.wand.net.nz/openwrt/hostapd/mips_24kc/repo-key.pub -O /tmp/hostapd-repo-key.pub
root@openflow-ap:~# opkg-key add /tmp/hostapd-repo-key.pub
When the repo is added we can then upgrade hostapd to the patched version and restart hostapd:
root@openflow-ap:~# opkg update
root@openflow-ap:~# opkg list-upgradable | grep -E '(wpad|hostapd)' | awk '{print $1}' | xargs opkg upgrade
root@openflow-ap:~# wifi up
5. Configure Faucet
Now that OpenWrt and Open vSwitch is all installed and configured our router is ready to receive its instructions from an OpenFlow controller.
I won’t fully cover installing and configuring faucet here, if you aren’t familiar with how to do that, follow the installing faucet for the first time tutorial.
To configure our router in faucet we will need its datapath id, this can be obtained from Open vSwitch with this command:
root@openflow-ap:~# ovs-ofctl show ovsbr | grep dpid
OFPT_FEATURES_REPLY (xid=0x2): dpid:0000e4956e4a732a
We will also need to configure Open vSwitch to speak to our faucet controller:
root@openflow-ap:~# ovs-vsctl set-controller ovsbr tcp:172.16.0.10:6653 tcp:172.16.0.10:6654Below is a very basic faucet configuration I used to bring up the router with all ports on the same VLAN. Some interesting things to note about the configuration is the eapol-to-local ACL which sends EAPOL packets (which are used for WiFi authentication) to the OFPP_LOCAL port which is where our patched hostapd is listening and can reply (we could also use faucet to NFV these packets to a central hostapd server for processing). We will also see hairpin mode is enabled on the WiFi ports, this allows packets that enter the WiFi interfaces to be sent back out the same interface (useful if you don’t want client isolation enabled on your radios). If you want to play with more faucet features try the faucet tutorial series.
faucet.yaml
vlans:
    office:
        description: "office vlan"
        vid: 10

acls:
    # Default allow
    default_allow:
        - rule:
            actions:
                allow: 1                 # allow

    # Default drop
    default_drop:
        - rule:
            actions:
                allow: 0                 # drop

    # Send EAPOL packets to OFPP_LOCAL port (so hostapd can process)
    eapol-to-local:
        - rule:
            dl_type: 0x888e              # EAPOL
            actions:
                output:
                    port: 0xfffffffe     # OFPP_LOCAL

dps:
    openflow-ap:
        dp_id: 0xe4956e4a732a
        description: "openflow-ap"
        hardware: "Open vSwitch"
        interfaces:
            1:
                name: "lan1"
                native_vlan: office
            2:
                name: "lan2"
                native_vlan: office
            3:
                name: "wlan0"
                native_vlan: office
                acls_in: [eapol-to-local, default_allow]
                hairpin: True
            4:
                name: "wlan1"
                native_vlan: office
                acls_in: [eapol-to-local, default_allow]
                hairpin: True
            0xfffffffe:
                description: "OFPP_LOCAL"
                output_only: True